 Install Designer - Features
Create dialogs for NSIS and Inno Setup
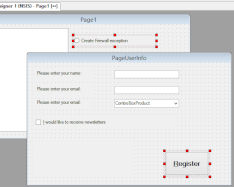
Install Designer allows you to create dialogs (setup Pages and Forms) for
 NSIS and
  Inno Setup installation systems.
Using  NSIS dialogs you can build awesome NSIS (Nullsoft Scriptable Install System) installers.
With  Inno Setup dialogs you can develop famous Jordan Russel's Inno Setup powerful installers.
Dialogs are saved in separate file (.designer) and they are easy to be reused in several installers.
Controls can be copied from one dialog to second and vice versa and dialogs created for  NSIS can be used in
  Inno Setup installers and vice versa!
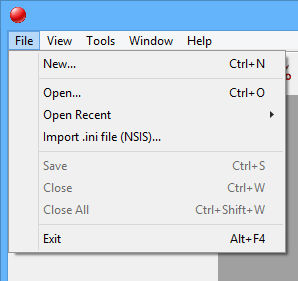
And the last but not least: If you have an existing  InstallOptions dialogs (.ini files) you can easily import them!
Search (Filter) control's properties
Install + Uninstall dialogs, setup Pages + Forms
With Install Designer you can design dialogs for your setup easily and even more.
 NSIS dialogs are called Pages - it is possible to create both Installer and Uninstaller Pages and you can switch the dialog position to be in installer/uninstaller any time.
 Inno Setup installers are based on Wizard Pages - you can design them as Pages (TWizardPage).
Inno Setup also allows to use completely independent forms and these can be designed too as Forms (TSetupForm) and designer allows you to switch from Page to Form anytime.
Available controls
Each dialog consists from one or several controls placed on them. There are many standard Windows controls supported and other special ones:
+ several nsDialogs controls for  NSIS
NSIS
+ many  Inno Setup controls from Pascal Scripting Reference.
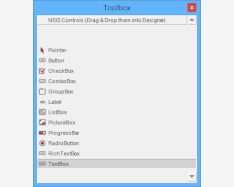
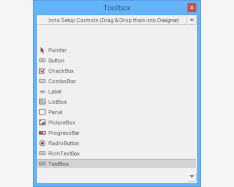
All controls are displayed in Toolbox window and you can Drag & Drop them onto dialog.
List of all currently supported controls (alphabetically:
| Windows name | Icon |  NSIS Type NSIS Type
|
 Inno Type Inno Type
|
|---|---|---|---|
| Button | 
|
Button | TNewButton |
| CheckBox | 
|
CheckBox | TNewCheckBox |
| ComboBox | 
|
ComboBox | TNewComboBox |
| DateTimePicker | 
|
DatePicker | - |
| GroupBox | 
|
GroupBox | - |
| Label | 
|
Label | TLabel |
| LinkLabel | 
|
Link | - |
| ListBox | 
|
ListBox | TNewListBox |
| Panel | 
|
- | TPanel |
| PictureBox | 
|
Bitmap | TBitmapImage |
| ProgressBar | 
|
ProgressBar | TNewProgressBar |
| RadioButton | 
|
RadioButton | TNewRadioButton |
| RichTextBox | 
|
RichEdit | TRichEditViewer |
| TextBox | 
|
Text / Password / Number | TNewEdit |
| TrackBar | 
|
HTrackBar / VTrackBar | - |
We are working on some rare controls and still increasing this list.
Controls properties
Do you remember all the Properties of specific control? String for Button is displayed with Text property or with Caption? Not sure?
You can also Search (Filter) them 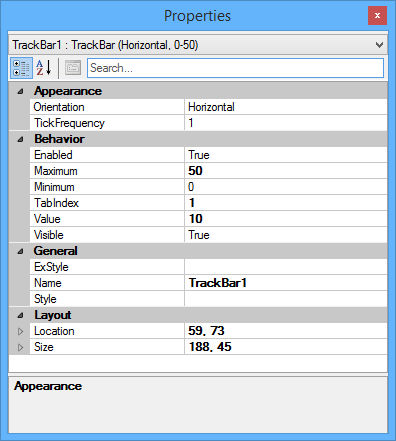
Search (Filter) control's properties
by their name.
Now you do not have to remember everything! Simply click the control in designer and all available control's properties are shown in Properties window and you can set them easily.
The control is updated immediately after you update the property value. And also the property is changed when you update the control in designer (e.g resizing the control with mouse).
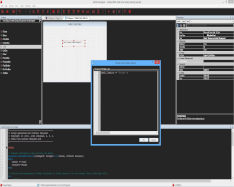
WYSIWYG designer with immediate Script preview
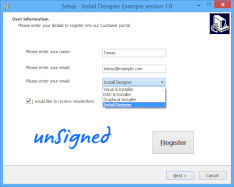
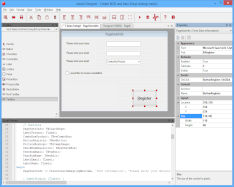
Using Install Designer is easy and your resulting dialogs will look exactly like you design them.
Intuitive Drag & Drop tools for manipulation with controls (alignment, moving, resizing, ...) makes work easier and faster.
We took inspiration from the most successful tools in this field and all Visual Studio users will be able to design their install dialogs immediately without need to learn anything!
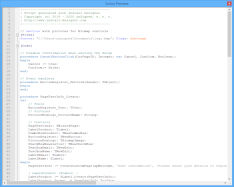
After any change in designer the resulting script is updated and you can see it in Script preview window.
Unlimited Undo + Redo steps
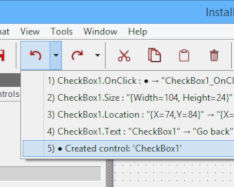
Did you make any unwanted change or accidentally deleted a control? Undo that!
The Undo action, similarly to Undo in any other application, allows you to go back and cancel the last performed step (default shortcut: Ctrl + Z).
To go forward use the Redo action (default shortcut: Ctrl + R) that performs cancelling the last undoned step.
The number of Undo + Redo steps is unlimited, however the amount of steps shown under the toolbar button (in the drop down list) is limited to 10.
Both Undo + Redo actions are available through the context menu or toolbar buttons.
Controls Z-order
Z-order represents how the controls are layered on the dialog - one control can be placed atop of another and vice versa.
Usually the container controls like Panel or GroupBox containing other controls are needed to be at the bottom so they do not cover the controls placed on them.
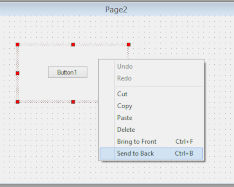
The Bring to Front action (default shortcut: Ctrl + F) moves the control to the top while the Send to Back action (default shortcut: Ctrl + B) moves the control to the bottom.
Both actions are available through the context menu or toolbar buttons.
Testing the dialog and Instructions to use
Install Designer offers you to show the designed dialog in real installer with a single click!
Simply click Compile + Run button (F5), the script compiles and a real  NSIS and
  Inno Setup installer launches where you can see your dialog in action.
Are you satisfied with your dialog? Then feel free to use it in your installer!
Click the Usage button (F9 - dialog must be saved first!) to show the instructions how to include your dialog in an installer.
Follow to instructions or see our video tutorials and enjoy your new dialog!
Script syntax highlighting and optimizations
Syntax highlighting is important feature for anyone who works with script or code.
It improves readability of the scripts - there are many elements supported: Keywords, Comments, Parameters, Variables, Constants, Labels, Preprocessor and many more...
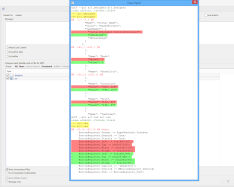
Install Designer compiler also keeps an eye on your script. Your installer is compiled fine - but with this feature it can be even better!
If you forget to remove some unreferenced item you will get an warning. Unused or unreferenced install/uninstall Functions, Variables, global/regular Labels and other items are recognized. Clean up your script and save memory!
Works for both  NSIS and
  Inno Setup scripts.
Full version control system support
If you are working on a large projects with multiple files, together with other people you know the situation: after some time without using Source Code Control (SCC) system the development chaos begins...
It is possible to integrate various Source Code Control providers into RAD Studio: Git, Mercurial, Subversion, etc.
You can use them on your NSIS and Inno Setup dialogs (*.designer files, because they are text based) and of course on generated scripts and your development will be smooth!
Dynamic help system
Install Designer is really high tied with  NSIS and
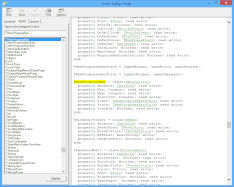
  Inno Setup. If you used to use dynamic help system in your preferred scripting IDE you can use it also for NSIS and Inno Setup designers.
Simply press F1 anytime you need a help and appropriate help (manual file) will be opened. Dymanic help is of course context sensitive!
If you are not use about some parameter of you need more info about command then select it and press F1 - again manual is opened and selected item is immediately searched.
No more need for googling or looking for manuals is necessary. Save your time!
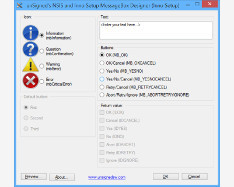
MessageBox Designer
User friendly (GUI) application for fast and easy creating of  NSIS script or
  Inno Setup MessageBox-es.
With this handy feature you do not need to manually write the code but you only select design of your desired MessageBox and appropriate code is generated.
You can also preview the MessageBox so you immediately see how it looks like and define its result (which button was clicked).
To use this feature run standalone application MessageBoxDesigner.exe in the installation directory (or from Start menu).
Version checking and updating
It is very important to keep your software up-to-date. The latest software release contains important fixes and updates which may prevent many troubles during your work with the software.
Install Designer offers version checking at start (can be turned On or Off in Settings dialog) and manual checking.
The updater reads latest version info from our servers and offers you to download and install new version (if available).
It also checks for latest  NSIS and
  Inno Setup versions so you do not need to visit their websites!
Dark Theme(s) support
Many programmers who work with a computer on daily basis can confirm that looking at a monitor or display for a long time is killing their eyes. Especially the light white colors are bad. That is a reason why more and more people prefer dark themes above light ones.
Install Designer contains support for dark theme. If the Dark Theme option is turned on (Default is Off) the whole GUI and appropriate dialogs are drawn with dark colors which is very similar to High contrast option in Windows.
Dark theme can be turned on / off in Settings dialog (which sets predefined colors for dialogs, syntax highlighting and other elements), application restart is required.
Dark Theme is also applied to scripts of both  NSIS and
  Inno Setup - the viewers are themed an also script syntax highlighting colors are affected.
Install Designer Settings Dialog
In this dialog (click Tools -> Settings.. (F11) in main menu) you can adjust most of the Install Designer properties. Certain options are common for both systems:
 NSIS and
  Inno Setup and some are for specified feature only.
If you can see text "This feature can be adjusted in Settings dialog." then you can adjust specific feature in this dialog.
Some settings may require the .designer file reload or application restart.
Settings dialog is divided into three parts:
- 1. Tree with categories (in the left) - Install Designer options are divided into several categories. Each category covers different features.
- 2. Panel with options (in the right) - After you click category node in the Tree the right area is updated and appropriate options are shown.
- 3. Control buttons (at the bottom) - Use the OK button to save your changes. Clicking the Cancel button discards all changes and closes the Settings dialog.
